
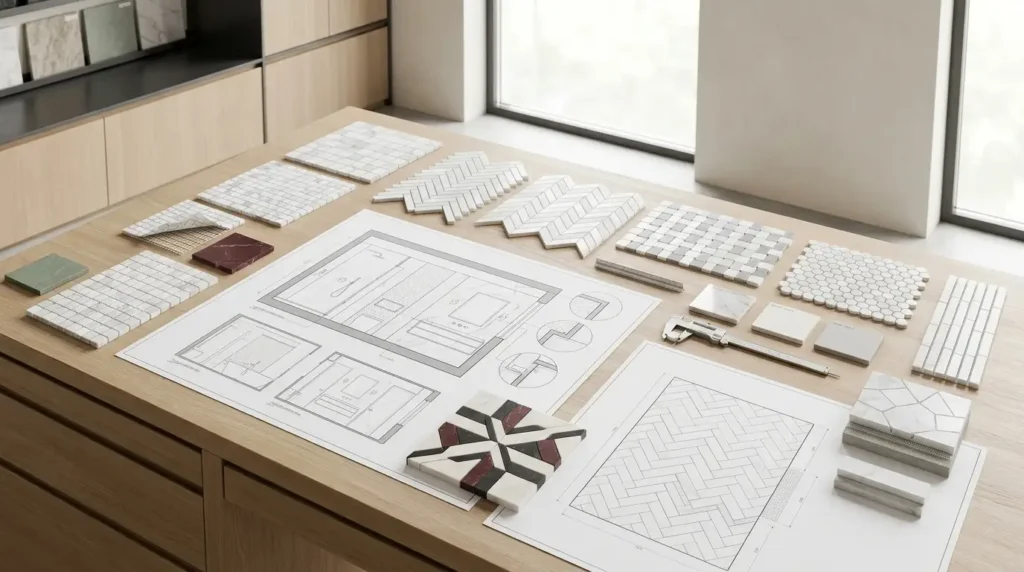
A marble mosaic specification should never stop at:
“Honed marble mosaic.”
That describes a material and a finish.
It does not fully describe the architectural product.
A mosaic introduces an additional layer of design decisions because the finished surface is assembled from many small stone components.
The architect may need to coordinate:
- stone selection
- chip dimensions
- pattern geometry
- nominal sheet dimensions
- thickness
- finish
- cut quality
- mounting method
- joint width
- sheet-to-sheet transition
- pattern orientation
- substrate
- waterproofing
- setting materials
- grout
- movement joints
- edges
- transitions
- drains
- corners
- samples
- mock-ups
- CAD drawings
- installation sequence
A mosaic can therefore look simple from several meters away while being technically much more complex than a large-format stone tile.
Successful specification requires thinking about the mosaic as:
stone + geometry + mounting + joints + installation system
rather than as a decorative surface alone.
This guide provides a practical framework for architects specifying marble and natural-stone mosaics for bathrooms, hospitality projects, residential interiors and custom architectural applications.
Start with the Architectural Role of the Mosaic
Before selecting a pattern, define what the mosaic needs to do.
Is it being used as:
- shower flooring
- bathroom flooring
- shower wall
- feature wall
- niche lining
- backsplash
- hotel bathroom accent
- spa surface
- reception feature
- decorative border
- floor inset
- custom artwork
- transition between materials?
Different applications create different priorities.
For example:
a decorative wall mosaic may prioritize:
- pattern scale
- stone color
- visual rhythm
while a shower-floor mosaic also needs to coordinate:
- slope
- drainage
- waterproofing
- setting system
- joint density
- finish
- maintenance
Application should therefore be defined before the pattern is finalized.
A Mosaic Is a System, Not Just a Pattern
A pattern such as:
herringbone
does not fully define a mosaic.
A complete product may still vary according to:
- individual chip dimensions
- thickness
- stone
- finish
- joint width
- sheet size
- mounting
- orientation
Two herringbone mosaics can therefore produce very different architectural results.
One may be:
- fine
- delicate
- visually dense
while another may appear:
- larger
- more graphic
- more architectural
The pattern name is only the beginning.
Specify the Stone First
Natural marble contributes variation at a much smaller scale in mosaic than in large slabs.
A single sheet may contain many individual stone pieces.
Each piece can vary in:
- background color
- vein
- crystal structure
- mineral markings
This means a highly expressive marble may produce a much busier mosaic surface than the same stone used as a large slab.
Before specifying a stone, consider whether its visual character suits the intended mosaic scale.
Calm Marble for Complex Patterns
More intricate patterns often benefit from relatively calm stone.
For example:
complex basketweave geometry
controlled white marble
may provide clearer pattern readability than a strongly veined stone.
The geometry remains the dominant design feature.
Dramatic Marble for Simple Formats
Expressive stone can work particularly well in simpler formats.
For example:
10 × 10 mm squares
or
large hexagons
may allow the natural stone variation to provide the visual complexity.
A useful design principle is:
complex stone + simple geometry
or:
calm stone + complex geometry.
This is not a fixed rule, but it helps control visual competition.
Define the Marble Selection Range
As with slabs and tiles, the commercial stone name does not completely describe the expected appearance.
The architect may need to define:
- background color
- acceptable vein range
- dark markings
- tonal variation
- overall movement
For a white marble mosaic, for example:
Background: predominantly white
Veining: soft grey, controlled
Dark pieces: limited
Overall variation: balanced across sheets
Finish: approved honed reference
This gives production and quality-control teams a clearer target.
Mosaic Variation Is Read Differently from Slab Variation
Large slabs allow the eye to follow one geological movement.
Mosaics fragment the stone into many pieces.
This can change how variation is perceived.
A dark vein that looks elegant across a full slab may become:
- several dark chips
- isolated stripes
- concentrated spots
when cut into mosaic pieces.
The architect should therefore review the stone in the actual intended mosaic format, not only as a slab sample.
Chip Size Changes the Architecture
Individual mosaic-piece dimensions strongly influence the visual scale of the surface.
Common architectural options can include formats such as:
- 10 × 10 mm
- 15 × 15 mm
- 25 × 25 mm
- larger squares
- elongated strips
- small hexagons
- larger hexagons
- penny rounds
- custom waterjet pieces
The same marble can feel completely different at each scale.
10 × 10 mm Marble Mosaic
A small square format creates:
- high pattern density
- many joints
- fine visual texture
- strong ability to follow curved or sloped surfaces
At distance, the stone can appear almost textile-like.
Close up, individual marble variation becomes visible.
Small formats can be particularly useful for:
- shower floors
- curved surfaces
- detailed borders
- small architectural zones
where appropriate to the complete installation system.
15 × 15 mm Marble Mosaic
A slightly larger module provides:
- more visible stone per chip
- somewhat reduced joint density
- clearer marble character
while retaining a fine mosaic scale.
This can work well for:
- bathroom floors
- walls
- hospitality applications
- decorative fields
depending on the specific material and installation.
25 × 25 mm Marble Mosaic
Larger square mosaics allow the stone itself to become more visible.
Compared with smaller chips, they generally provide:
- stronger stone identity
- fewer joints per area
- more obvious mineral variation
- more architectural scale
They can work particularly well where the mosaic should read as natural stone first and pattern second.
Bigger Is Not Automatically Better
Large mosaic chips can show more of the marble.
But small pieces can follow:
- slopes
- curved geometry
- irregular surfaces
more readily.
The correct format depends on:
- application
- drainage
- pattern
- architecture
- stone
- desired visual scale
rather than a trend.
Nominal Sheet Size Must Be Specified
Most factory-made architectural mosaics are assembled into manageable sheets.
A common nominal concept is approximately:
300 × 300 mm
but the actual sheet size can differ significantly according to pattern.
For example:
- herringbone
- chevron
- basketweave
- penny round
- hexagon
may create sheets that are:
- rectangular
- irregular
- interlocking
- smaller or larger than 300 mm
Therefore, never assume every mosaic sheet is exactly:
300 × 300 mm.
Request the actual product dimensions.
Nominal Sheet Size vs Coverage Size
A sheet may have:
- irregular outer edges
- projecting pieces
- interlocking geometry
so its physical bounding dimensions may differ from its effective repeat.
This matters when calculating:
- quantities
- layout
- borders
- transitions
- wall dimensions
The architectural drawing should use actual manufacturer or production geometry where precision matters.
Do Not Design Using a Generic 300 × 300 Grid
One of the easiest mistakes is placing a generic:
300 × 300 mm mosaic module
across a CAD elevation even though the actual sheet has an irregular repeat.
This can create incorrect assumptions about:
- joints
- pattern endpoints
- border conditions
- waste
For visually critical work, request:
- actual sheet dimensions
- repeat dimensions
- CAD geometry
before finalizing the drawing.
Mosaic Thickness Matters
Natural-stone mosaics often need to meet adjacent materials.
The specification should therefore define nominal thickness.
The architect should coordinate mosaic thickness with:
- adjacent stone tile
- porcelain
- timber
- plaster
- metal profiles
- shower drains
- thresholds
A few millimeters of difference can become very visible at a transition.
Do Not Assume All Mosaic and Tile Thicknesses Match
A project may combine:
large-format marble tile
with:
marble mosaic.
Even if both use the same stone, their finished thickness may differ.
This may require adjustment through:
- setting bed
- substrate
- backing
- transition profile
Plan the interface before installation.
Finish Is Especially Important in Mosaic
Common marble mosaic finishes include:
- honed
- polished
- brushed
- other stone-specific treatments
where suitable.
The finish changes both:
- visual character
- practical behavior
of the installed surface.
Honed Marble Mosaic
Honed surfaces provide:
- reduced reflection
- softer stone color
- contemporary appearance
- greater visual emphasis on geometry
Honed mosaic is highly versatile for:
- bathrooms
- walls
- floors
- hospitality projects
where the selected stone and assembly are suitable.
Polished Marble Mosaic
Polishing can increase:
- color depth
- vein contrast
- reflection
This can create a more decorative or formal result.
On highly articulated mosaic surfaces, however, many small polished pieces can produce numerous reflections.
Always review a physical sample under realistic project lighting.
Do Not Select Wet-Area Finish by Appearance Alone
A finish that looks excellent on a decorative wall may not be appropriate for a wet floor.
Wet-area specification should consider:
- current applicable slip requirements
- individual mosaic size
- joint configuration
- slope
- drainage
- maintenance
- installation system
Do not make universal wet-floor suitability claims based only on the stone name or pattern.
Mounting Method Must Be Known
Many marble mosaics are supplied preassembled.
Common approaches may include:
- mesh-backed sheets
- face-mounted systems
- paper or film face mounting
- loose numbered pieces
- custom assembled sections
depending on the product.
The mounting method affects:
- handling
- installation
- setting-material compatibility
- wet-area suitability
- pattern alignment
It should therefore be part of the product specification.
Mesh-Backed Marble Mosaic
Mesh backing makes many repetitive mosaic patterns easier to:
- package
- transport
- position
- install
because multiple chips are held together as one sheet.
However, the architect and installer should verify that:
- the backing
- backing adhesive
- setting material
are compatible with the proposed application.
This is particularly important in demanding or wet installations.
Mesh Is Not the Structural Substrate
The mesh keeps individual mosaic pieces assembled.
It does not replace:
- substrate preparation
- waterproofing
- setting bed
- structural support
The installed system must still be designed according to the application.
Face-Mounted Mosaic
Some mosaics may use a temporary face-mounted system.
This can leave more of the stone back available for bonding.
The temporary face material is removed during the installation process according to the specific system.
The architect should not assume all mosaic products use the same mounting method.
Custom Waterjet Mosaic May Use Several Delivery Methods
Large custom waterjet compositions may be supplied as:
- mesh-backed sections
- numbered loose pieces
- numbered modules
- partially assembled sections
depending on:
- design
- scale
- geometry
- transport requirements
This should be coordinated before production.
Grout Joint Is Part of the Design
Grout should not be treated as an invisible technical material.
In mosaic, grout occupies a substantial percentage of the visible surface.
It directly influences:
- pattern readability
- color
- contrast
- perceived scale
- maintenance
Therefore, grout intent should be considered during design.
There Is No One Universal Marble Mosaic Joint Width
The appropriate joint depends on variables such as:
- chip dimensions
- dimensional variation
- edge condition
- pattern
- sheet construction
- application
- grout system
Do not simply apply one fixed joint width to every mosaic.
The important objective is a consistent finished pattern that accommodates the actual product.
Internal Joint and Sheet Joint Should Read Together
This is one of the most important mosaic installation details.
A sheet contains joints between its individual pieces.
When two sheets meet, the spacing between them should visually correspond to the internal spacing.
Otherwise the wall or floor may reveal:
a grid of sheet boundaries.
This is a common visual failure.
The Finished Surface Should Not Reveal the Sheet
Unless deliberately designed that way, the viewer should see:
one continuous mosaic field
rather than:
a collection of mesh sheets.
This requires attention to:
- sheet geometry
- installation spacing
- pattern alignment
- joint adjustment
during installation.
Interlocking Sheets Can Reduce Visible Boundaries
Some patterns use irregular or interlocking sheet edges.
This can help prevent a strong rectangular sheet grid.
But the installer still needs to:
- align the pattern
- adjust neighboring sheets
- maintain consistent joints
Interlocking geometry does not eliminate installation skill.
Grout Color Changes Pattern Contrast
Consider a white and grey marble mosaic.
Light Grout
Can:
- visually merge the field
- reduce joint contrast
- emphasize stone
Darker Grout
Can:
- strengthen geometry
- make every individual piece more visible
- alter the perceived pattern scale
Neither is universally correct.
The grout color should follow the architectural intent.
Test Grout on the Actual Stone
Natural marble can interact visually with grout through:
- pigment
- texture
- surface porosity
- cleaning process
Before approving the final grout, test it on:
the actual mosaic + actual finish.
Check:
- final color
- possible scratching
- possible staining
- cleanup
- joint appearance
Do not rely only on a grout color card.
Protect Scratch-Sensitive Marble
Some grout systems or installation methods may affect polished or softer marble surfaces.
Grout selection should therefore consider:
- joint width
- marble sensitivity
- grout aggregate
- manufacturer’s compatibility guidance
A trial area is often valuable.
Setting Material Can Influence Light Marble
Pale natural stone can be visually sensitive to what sits behind it.
The specified installation system should therefore be compatible with:
- the exact stone
- backing
- substrate
- wet/dry condition
For light-colored or potentially translucent marble, the setting assembly should be reviewed to avoid undesirable visible color influence.
Do Not Specify Adhesive by Habit
The correct setting material depends on:
- stone
- backing
- substrate
- location
- moisture exposure
- product system
A mortar appropriate for one mosaic may not be appropriate for another.
Use current installation-system recommendations for the actual assembly.
Substrate Flatness Is Critical
Small mosaic chips can follow surface irregularities very closely.
A substrate defect can become visible through the finished mosaic.
Possible visual problems include:
- waves
- bumps
- depressions
- inconsistent joints
- distorted reflections
The installation substrate should therefore meet the required flatness and preparation criteria before setting begins.
Mosaic Does Not Fix a Poor Substrate
Because individual chips are small, it may appear that mosaic can hide substrate defects.
In practice, the opposite can happen.
The finished field may reproduce the defect across many small pieces.
Proper substrate preparation remains essential.
Wet Areas Require a Complete Assembly
A marble shower should never be specified only as:
“Marble mosaic over waterproofing.”
The complete design should coordinate:
- structural substrate
- slope
- waterproofing
- drain
- setting material
- mosaic
- grout
- perimeter and movement joints
- sealant
- maintenance
The mosaic is the visible finish layer.
It is not the waterproofing system.
Marble Mosaic Shower Floors
Small-format mosaic can be useful on shower floors because individual pieces can follow multi-directional slopes more readily than large rigid tiles.
But the architect should still verify:
- stone suitability
- surface finish
- wet slip requirements
- chip dimensions
- joint configuration
- slope
- drain geometry
- waterproofing
- setting system
Small chips do not automatically make a shower floor suitable or safe.
Coordinate Mosaic Size with the Drain
The relationship between:
- chip size
- sheet geometry
- drain size
- slope
can influence the final quality.
A drain placed randomly within an intricate pattern may create:
- awkward cuts
- tiny fragments
- broken geometry
Where possible, coordinate the drain with the mosaic module during design.
Linear Drains and Mosaic
A linear drain may allow a different floor layout from a central point drain.
The mosaic orientation can potentially remain more continuous.
But:
- slope design
- perimeter conditions
- waterproofing
- local requirements
still need to be resolved as a complete system.
Niches Need Their Own Mosaic Layout
A shower niche is small enough that pattern termination becomes obvious.
Before installation, consider:
- back panel
- side returns
- top
- bottom
- surrounding field
- trim or stone edge
Do not simply continue sheets into the niche without studying the pattern.
Wall-to-Floor Transition
When the same mosaic is used on both wall and floor, decide whether:
- joints align
- pattern continues
- wall layout begins independently
There is no universal answer.
The condition should be drawn intentionally.
Inside Corners Should Be Designed
A repeating pattern may not wrap perfectly around an inside corner.
Possible approaches include:
- continue the pattern
- mirror the pattern
- terminate cleanly
- use a border
- introduce a field tile
The best solution depends on the geometry.
Do not leave decorative corner logic entirely to the installer.
External Corners Need Edge Strategy
At external corners, possible approaches may include:
- mitred mosaic
- stone trim
- metal profile
- solid-stone return
- designed termination
The correct detail depends on:
- mosaic
- application
- durability
- architecture
A raw exposed mesh edge should never be the accidental final detail.
Mosaic Borders Should Be Dimensioned
For decorative borders, drawings should define:
- total border width
- repeat
- corner condition
- stone palette
- relationship to field tile
A border that looks good in a mood board may not resolve cleanly around an actual room.
Herringbone Marble Mosaic
Herringbone creates strong directional movement.
The architect should define whether the pattern is oriented:
- vertically
- horizontally
- along a corridor
- toward a focal point
Rotation changes the architectural effect dramatically.
Herringbone Scale Matters
A fine herringbone can feel:
- textile-like
- detailed
- decorative
A larger herringbone can feel:
- more graphic
- architectural
- contemporary
Specify the individual piece size, not only:
“herringbone.”
Chevron Marble Mosaic
Chevron creates a cleaner continuous V geometry because the ends of individual pieces are cut to form the angle.
It should not be confused with herringbone.
Herringbone
Rectangular pieces overlap in a broken zigzag.
Chevron
Angled pieces meet to create continuous V lines.
The difference should be clear in:
- schedule
- drawing
- specification
because these are different products.
Chevron Direction
Chevron naturally creates a strong axis.
The V can point:
- upward
- downward
- toward a feature
- along circulation
Orientation should appear on the drawing.
Basketweave Marble Mosaic
Basketweave combines small rectangular and square elements into a repeating woven geometry.
The pattern can become more decorative than simple field mosaics.
It works particularly well when:
- stone colors have controlled contrast
- individual pieces are dimensionally consistent
- sheet boundaries disappear
For multi-stone basketweave, define exactly which stone is used for each component.
Penny Round Marble Mosaic
Penny round introduces:
- circular geometry
- high joint density
- softer visual texture
It can be effective for:
- bathrooms
- niches
- feature surfaces
depending on the actual marble and installation.
Because grout occupies significant visual area between circles, grout color becomes especially influential.
Hexagon Marble Mosaic
Hexagons can range from:
- very small
- finely textured formats
to:
- larger architectural modules.
The size should therefore always be specified.
A statement such as:
“white marble hexagon mosaic”
is incomplete without:
- hexagon dimensions
- sheet size
- thickness
- finish
- grout intent
Kitkat Marble Mosaic
Elongated narrow strips can create a highly linear surface.
The strips may be oriented:
- vertical
- horizontal
which changes the perceived proportions of the architecture.
Vertical orientation can emphasize height.
Horizontal orientation can emphasize width.
The drawing should make the intended direction clear.
Small Square Mosaic
Simple square mosaics are extremely useful architecturally because they allow the stone itself to remain visible without introducing complex decorative geometry.
They can be effective for:
- shower floors
- walls
- curved forms
- minimalist interiors
depending on the specification.
Pattern Scale Should Respond to Room Scale
A pattern that looks balanced on a sample board may become excessively dense across a large hotel wall.
Conversely, a large-format pattern may lose its effect inside a small niche.
Always review:
pattern scale relative to architectural scale.
This is especially important for:
- hotel bathrooms
- reception features
- large spa walls
- custom waterjet fields
Use Elevations to Check Pattern Scale
For important projects, place the actual mosaic repeat into:
- CAD elevation
- BIM view
- rendered elevation
at real scale.
This helps evaluate:
- repeat frequency
- border conditions
- cut pieces
- alignment with fixtures
before procurement.
Custom Marble Mosaic Requires More Information
A custom mosaic may be:
- geometric
- waterjet-cut
- multi-stone
- logo-like
- abstract
- floral
- architectural
The production brief should communicate much more than a reference image.
Start Custom Mosaic with CAD
Where possible, provide:
- DWG
- DXF
- vector geometry
- dimensioned PDF
or another precise drawing format agreed with production.
The drawing should define:
- overall dimensions
- pattern repeat
- individual geometry
- borders
- orientation
A low-resolution image is useful for concept direction, not final fabrication.
Define the Stone Color Map
For multi-stone custom mosaic, every pattern component should be assigned to a material.
For example:
Stone A: white marble
Stone B: burgundy marble
Stone C: black marble
A color map prevents ambiguity during production.
Do Not Depend Only on Digital Colors
A red area on a CAD drawing does not communicate the actual natural stone appearance.
The project should still review:
- physical samples
- stone images
- finish
- acceptable variation
before production.
Waterjet Marble Mosaic
Waterjet production allows stone to be cut into:
- curves
- complex geometry
- interlocking pieces
- decorative motifs
- custom borders
- medallions
with a high level of dimensional control.
However, the ability to cut complex geometry does not mean every detail should be extremely small.
Minimum Feature Size Should Be Reviewed
Very narrow or delicate natural-stone components may create:
- fragile pieces
- fabrication difficulty
- installation difficulty
- excessive joints
The production team should review the actual design and stone before finalizing delicate geometry.
Natural Veins Can Interact with Waterjet Geometry
A narrow decorative component cut across a strong natural vein may be more vulnerable than the same shape cut from a calmer area.
Material selection and geometric design should therefore be coordinated.
Dry Layout Is Valuable for Custom Mosaic
Before packing a complex custom composition, the pieces or sections can be dry assembled.
This allows review of:
- complete pattern
- stone distribution
- joints
- missing pieces
- border alignment
- overall dimensions
A photograph of the approved dry layout can also assist installation.
Number Custom Mosaic Sections
Large custom mosaic artwork may be divided into multiple transportable sections.
A numbering system can connect:
CAD drawing
→
mosaic section
→
crate
→
installation position.
This dramatically reduces confusion on site.
Installation Map
Complex mosaic projects can benefit from a simple installation map showing:
- section numbers
- orientation
- starting point
- neighboring sections
The more customized the geometry, the more valuable this becomes.
Sheet Orientation Should Be Marked Where Necessary
Some repetitive patterns appear similar when rotated.
Others completely change.
If orientation is important, the packaging or drawing should communicate:
- top
- bottom
- direction
clearly.
Marble Mosaic and Floor Transitions
Where mosaic meets larger stone tile, the design should resolve:
- elevation
- joint
- edge
- pattern termination
- movement requirements
A mosaic should not simply stop wherever the sheet ends.
Mosaic Rug Concept
One strong architectural application is using mosaic as a defined inset within a larger stone floor.
This can create:
- lobby feature
- bathroom rug effect
- entrance zone
- decorative border
The perimeter should be dimensioned carefully so the mosaic fits the surrounding field without awkward cut pieces.
Custom Mosaic in Hospitality Projects
Hotels can use marble mosaics for:
- bathrooms
- spas
- lift lobbies
- reception features
- restaurants
- bars
- suites
But repetitive hospitality use requires stronger documentation than a one-off residence.
The specification may need to control:
- pattern
- stone range
- sheet size
- thickness
- finish
- mounting
- quantities
- room-to-room consistency
Repeated Hotel Bathrooms Need a Repeatable System
Imagine:
150 identical hotel bathrooms.
The architect should consider whether the mosaic pattern can be produced and installed repeatedly with consistent:
- dimensions
- orientation
- transition details
- drain conditions
A beautiful one-room prototype may expose issues before mass production.
Use a Bathroom Mock-Up
For large hospitality projects, a bathroom mock-up can verify:
- stone selection
- mosaic scale
- grout
- joint appearance
- transitions
- shower slope
- drains
- niches
- lighting
before hundreds of rooms are produced.
This is one of the most useful opportunities to catch design issues early.
Control Sheet-to-Sheet Variation
With natural marble, sheets should not look digitally identical.
But large tonal jumps between neighboring sheets can create patchiness.
For important installations, production or site teams may need to mix sheets from multiple boxes or review material distribution.
The goal is:
controlled natural variation.
Do Not Install Box by Box Without Reviewing the Field
If one box happens to contain slightly darker material, installing it completely in one area can produce a visible patch.
For variation-sensitive marble, inspect the material across several packages before final placement.
Mock-Ups Are Especially Useful for Mosaic
A small installed mock-up can reveal more than loose sheets.
It allows the architect to review:
- actual joints
- grout color
- sheet transitions
- finish
- variation
- lighting
in something closer to the final condition.
Sample Sheet vs Installed Mock-Up
Sample Sheet
Useful for:
- marble
- chip size
- pattern
- finish
- approximate joints
Installed Mock-Up
Useful for:
- grout
- sheet blending
- substrate effect
- edge conditions
- final visual rhythm
They answer different questions.
Define What the Sample Controls
An approved mosaic sample may control:
- stone range
- chip dimensions
- pattern
- finish
- nominal joint character
It should not automatically guarantee that every natural stone chip will be identical.
Clarify the purpose of the approved sample.
Movement Joints Should Not Disappear from the Design
Mosaic does not eliminate movement-joint requirements.
Required joints in the underlying tile assembly should be coordinated with:
- mosaic field
- waterproofing
- architectural joints
- perimeter conditions
Do not rigidly grout across a joint that is required to accommodate movement.
The applicable installation standards and project conditions should determine the system.
Do Not Use Grout as a Movement Joint
Grout and movement accommodation serve different purposes.
Where movement is expected, use the appropriate flexible joint or system according to the project design.
This should be coordinated with the mosaic pattern rather than left until installation.
Curved Walls and Mosaic
Small mosaic formats can be particularly useful on curved architectural surfaces.
But the feasibility depends on:
- curvature radius
- chip size
- sheet flexibility
- backing
- joint behavior
A flat sample sheet does not prove that it will wrap cleanly around every radius.
For unusual curves, test a mock-up.
Columns
Mosaic can wrap cylindrical columns more effectively than large-format stone.
However, check how the pattern resolves at:
- start/end seam
- top
- bottom
If the repeat does not close neatly around the circumference, the termination should be designed.
Lighting Can Reveal Installation Errors
Grazing light can emphasize:
- uneven chips
- sheet boundaries
- substrate waves
- lippage
- irregular joints
This is particularly important on:
- long walls
- hospitality corridors
- illuminated feature surfaces
Coordinate lighting and mosaic mock-ups where the surface will receive strong directional illumination.
Natural Stone Mosaic Maintenance
Marble mosaics should be maintained according to:
- stone mineralogy
- finish
- grout
- application
For many conventional marble products, a conservative maintenance approach includes:
- pH-neutral natural-stone cleaner
- soft cleaning materials
- prompt spill removal
- avoidance of acidic cleaners
Acidic Cleaners and Marble
Many marbles contain calcium carbonate.
Acidic products can chemically alter these surfaces.
Avoid routine cleaning with substances such as:
- vinegar
- lemon-based cleaners
- inappropriate acidic bathroom products
unless the actual stone and maintenance system have been specifically confirmed as compatible.
Grout Maintenance Matters Too
A mosaic surface contains far more grout per square meter than a large-format tile surface.
Maintenance planning should therefore consider:
- stone
- grout
- sealant
- wet-area exposure
as a complete surface.
Sealing Should Be Stone- and System-Specific
Some natural stone and grout systems may benefit from:
- pre-sealing
- grout release
- post-installation impregnation
depending on:
- stone porosity
- finish
- grout
- application
Do not automatically apply one sealer specification to every marble mosaic.
Test the actual system.
Sealer Does Not Make Marble Acid-Proof
An impregnating treatment may improve resistance to certain stains.
It does not remove the chemical sensitivity of calcium-carbonate marble to acids.
That distinction should remain clear in maintenance documentation.
Quantity Calculation
Mosaic quantities should consider:
- net area
- sheet coverage
- pattern repeat
- cuts
- corners
- waste
- spare material
Complex patterns may require different allowances from basic square mosaic.
The appropriate allowance should be determined from the actual:
- room
- pattern
- sheet
- installation
rather than using one universal percentage.
Pattern Direction Can Affect Waste
For directional patterns such as:
- herringbone
- chevron
- kitkat
the required orientation can affect offcuts at:
- walls
- corners
- niches
This can increase material consumption.
Quantity calculations should reflect the actual layout.
Custom Waterjet May Require More Material Than Visible Area
Custom cutting requires the individual components to fit within source stone pieces.
Strong vein selection or color control can further affect yield.
Therefore, price and material quantity should not be based only on final installed square meters.
Spare Mosaic Material
For major projects, retain spare sheets or pieces from the original production.
Future batches may differ in:
- marble tone
- veining
- finish
- chip geometry
- backing
Original spare material can simplify future repairs.
Packaging Matters
Mesh sheets can be vulnerable to:
- bending
- detached pieces
- edge damage
- moisture
- pattern distortion
during transport.
Packaging should preserve:
- flatness
- sheet integrity
- orientation
until installation.
Custom Sections Need Clear Identification
For bespoke patterns, packages should ideally communicate:
- project area
- section number
- orientation
- quantity
in a way that corresponds with the installation drawing.
Architect’s Marble Mosaic Specification Checklist
Before issuing the specification, confirm:
Material
- marble or natural-stone type
- approved color range
- acceptable vein variation
- physical sample
- finish
Geometry
- individual chip size
- pattern
- orientation
- pattern repeat
- border dimensions where applicable
Product
- nominal sheet size
- actual sheet geometry
- thickness
- mounting method
- sheet edge configuration
- internal joint character
Application
- wall or floor
- wet or dry
- residential, hospitality or commercial
- slope requirements where relevant
- traffic and maintenance expectations
Assembly
- substrate
- waterproofing where required
- setting-material compatibility
- grout system
- movement joints
- sealant conditions
Detailing
- inside corners
- external corners
- transitions
- drains
- niches
- edges
- adjacent material levels
Approval
- sample sheet
- grout test
- finish sample
- installed mock-up
- dry layout where appropriate
- custom CAD drawing
Production
- stone color map
- sheet orientation
- custom section numbering
- quality-control reference
Installation
- layout drawing
- starting point
- sheet blending
- pattern continuity
- custom section map
Procurement
- quantity
- waste
- spare material
- production availability
- project schedule
- packing
Not every project requires every item.
The level of documentation should match the complexity of the mosaic.
Questions Architects Should Ask a Mosaic Supplier
Before approving a marble mosaic, ask:
- What is the exact stone?
- What natural variation should we expect?
- What is the individual chip size?
- What is the nominal sheet size?
- What is the actual sheet shape?
- What is the nominal thickness?
- How is the mosaic mounted?
- Is the mounting system appropriate for the intended application?
- What is the internal chip spacing?
- How should adjacent sheets be blended?
- Is the pattern directional?
- Is CAD geometry available?
- Can we review a physical sample?
- Can we test the proposed grout?
- Can an installed mock-up be prepared?
- Can custom sizes or patterns be produced?
- Can different marbles be combined?
- How are custom waterjet sections supplied?
- Are custom sections numbered?
- Can a dry layout or layout photograph be provided?
- What information does production require from the architect?
- How will replacement/spare material be handled?
These questions move the conversation from:
“Can you supply this pattern?”
to:
“Can this mosaic be controlled as an architectural system?”
Common Marble Mosaic Specification Mistakes
Specifying Only the Pattern Name
“Herringbone marble” does not define:
- chip dimensions
- stone
- thickness
- finish
- mounting
- joint.
Assuming Every Sheet Is 300 × 300 mm
Actual sheet dimensions vary by pattern.
Ignoring the Sheet Boundary
Poor spacing can make the installation look like a visible grid of sheets.
Choosing Marble from a Slab Sample Only
The stone may behave visually very differently once cut into small chips.
Ignoring Cut Direction
Directional patterns need clear orientation.
Confusing Herringbone and Chevron
They are different geometries.
Ignoring Grout During Design
Grout is a major visible component of mosaic.
Selecting Grout Without Testing the Marble
Color, staining and scratching behavior should be reviewed.
Treating Mesh Backing as Universally Compatible
Backing and setting material must work together.
Assuming Mosaic Solves Waterproofing
It does not.
Ignoring Drain Geometry
A drain can destroy an otherwise clean mosaic layout.
Designing Corners on Site
Pattern termination should be considered earlier.
Failing to Match Mosaic and Adjacent Material Thickness
Transitions can become awkward.
Using a Tiny Sample to Judge a Large Pattern
Pattern scale changes dramatically across a full wall.
Approving Custom Waterjet from a Rendering Only
Precise production needs accurate geometry.
Failing to Number Custom Sections
Installation becomes unnecessarily difficult.
Treating Natural Stone Variation as a Manufacturing Defect
Variation should be controlled through an approved range.
Forgetting Spare Material
Replacement may be difficult later.
A Practical Marble Mosaic Workflow for Architects
1. Define the Application
Wall, floor, shower, niche, feature or custom decorative area.
2. Choose the Stone Direction
Color and natural variation.
3. Choose the Pattern
Square, herringbone, chevron, basketweave, penny round, hexagon, kitkat or custom.
4. Select the Pattern Scale
Define actual chip dimensions.
5. Confirm Sheet Geometry
Request actual sheet and repeat dimensions.
6. Confirm Thickness
Coordinate with adjacent materials.
7. Select the Finish
Based on appearance and application.
8. Confirm Mounting
Mesh, face-mounted, loose or custom section.
9. Develop the Layout
Resolve orientation, corners, niches and transitions.
10. Coordinate Wet-Area Assembly
Where applicable.
11. Review a Physical Sample
Stone + pattern + finish.
12. Test Grout
Review both appearance and compatibility.
13. Prepare a Mock-Up
For visually or technically important applications.
14. Finalize CAD
For custom mosaic or waterjet work.
15. Approve Stone Color Map
For multi-material patterns.
16. Begin Production
After geometry and materials are fixed.
17. Dry Lay Custom Work
Where appropriate.
18. Number Sections
For complex custom patterns.
19. Inspect and Pack
According to installation sequence.
20. Install According to the Approved Layout
Preserve pattern, orientation and sheet blending.
Final Thoughts
Marble mosaic is one of the most flexible natural-stone tools available to architects.
It can create:
- fine texture
- strong geometry
- curved surfaces
- wet-area floors
- decorative walls
- intricate custom artwork
from the same geological material used for large-format architectural stone.
But the small scale of mosaic introduces more variables, not fewer.
A complete specification connects:
stone
chip size
pattern
sheet geometry
thickness
finish
mounting
joint
substrate
installation
approval.
The pattern name alone is not enough.
Specify actual chip dimensions.
Confirm actual sheet dimensions.
Understand the backing.
Coordinate the joint.
Treat grout as part of the architecture.
Resolve drain locations.
Design corners and transitions.
Use real CAD geometry for custom patterns.
Review the mosaic at architectural scale.
Test the actual stone and grout together.
Use mock-ups for repeated hospitality applications.
Dry lay complex waterjet compositions.
Number custom sections.
And make sure the installation documents preserve the design decisions made during specification.
The objective is not simply to choose a beautiful marble mosaic.
It is to create a mosaic system that remains beautiful when:
produced
packed
installed
and
used.
Frequently Asked Questions
What should a marble mosaic specification include?
A complete specification may include stone, chip size, pattern, nominal sheet size, thickness, finish, mounting method, grout intent, application, substrate, waterproofing where relevant, orientation, edges, samples and installation requirements.
What is a typical marble mosaic sheet size?
Many mosaic products are assembled around an approximately 300 × 300 mm nominal format, but actual dimensions vary significantly by pattern. Always specify the real sheet dimensions.
What is mosaic chip size?
Chip size is the dimension of each individual stone component within the mosaic rather than the complete mounted sheet.
Is mesh-backed marble mosaic suitable for wet areas?
Suitability depends on the complete product and installation system, including backing adhesive, setting material, substrate, waterproofing and manufacturer or technical recommendations. Mesh backing alone does not establish wet-area suitability.
What is the difference between herringbone and chevron mosaic?
Herringbone uses rectangular pieces arranged in an interlocking zigzag. Chevron uses angle-cut pieces that meet to create continuous V-shaped lines.
Is smaller mosaic better for a shower floor?
Small mosaics can conform more readily to multi-directional slopes and provide more grout joints, but this does not automatically establish wet-slip suitability. The complete floor assembly and applicable requirements must still be evaluated.
Should mosaic grout joints have a standard width?
There is no single universal joint width appropriate to every mosaic. Joint width depends on product dimensions, variation, edge condition, pattern and installation system.
Should joints between mosaic sheets match the joints inside the sheet?
Visually, the transition between sheets should generally blend with the internal mosaic spacing so the finished installation does not reveal the sheet boundaries unless that effect is intentional.
Does grout color matter with marble mosaic?
Yes. Grout can substantially alter pattern contrast, perceived stone color and the visual scale of the mosaic.
Should grout be tested before installation?
For important natural-stone projects, testing the proposed grout on the actual mosaic can help review color, cleanup, scratching and possible staining.
Can marble mosaic be used on curved walls?
Small-format mosaics can often accommodate curved surfaces better than larger rigid tiles, but the actual chip size, sheet flexibility, backing and curvature should be reviewed or mocked up.
Can marble mosaics be custom made?
Yes. Custom mosaics can be produced using geometric cutting, waterjet fabrication and multi-stone compositions based on approved drawings.
What information is needed for a custom waterjet mosaic?
Useful information includes overall dimensions, CAD geometry, pattern repeat, stone palette, finish, thickness, orientation, borders and installation area.
Should custom mosaics be dry laid?
Dry layout can be particularly useful for complex waterjet or multi-section work because the complete composition can be reviewed before packing and installation.
Should custom mosaic sections be numbered?
Yes, numbering is highly useful for complex compositions divided into several production or shipping sections.
Does marble mosaic need waterproofing in a shower?
The mosaic itself is not the waterproofing layer. Wet-area design requires an appropriate waterproofing and installation assembly beneath the finish.
Can vinegar be used to clean marble mosaic?
Acid-sensitive marble should not routinely be cleaned with vinegar or other acidic products because they can chemically alter the stone surface.
Does sealing make marble mosaic stain-proof?
No. An appropriate impregnating treatment may improve stain resistance in some applications but does not make natural stone completely stain-proof or acid-proof.
Specifying Marble Mosaic for a Project?
VeraMarbles supports architects, interior designers and project teams developing standard and custom natural-stone mosaics.
Send us your:
- architectural drawing
- room or application dimensions
- preferred marble or color direction
- mosaic pattern
- chip dimensions
- finish
- estimated quantity
- reference image
- custom CAD pattern where applicable
- project location
- schedule
We can support your project with:
- marble selection
- custom mosaic development
- square mosaics
- herringbone
- chevron
- basketweave
- penny round
- hexagon
- kitkat
- custom geometric patterns
- waterjet mosaics
- multi-stone combinations
- sample production
- finish coordination
- sheet development
- pattern-scale review
- CAD coordination
- dry layout
- custom section numbering
- quality control
- export packing
- project coordination
Request Mosaic Specification Support from VeraMarbles