
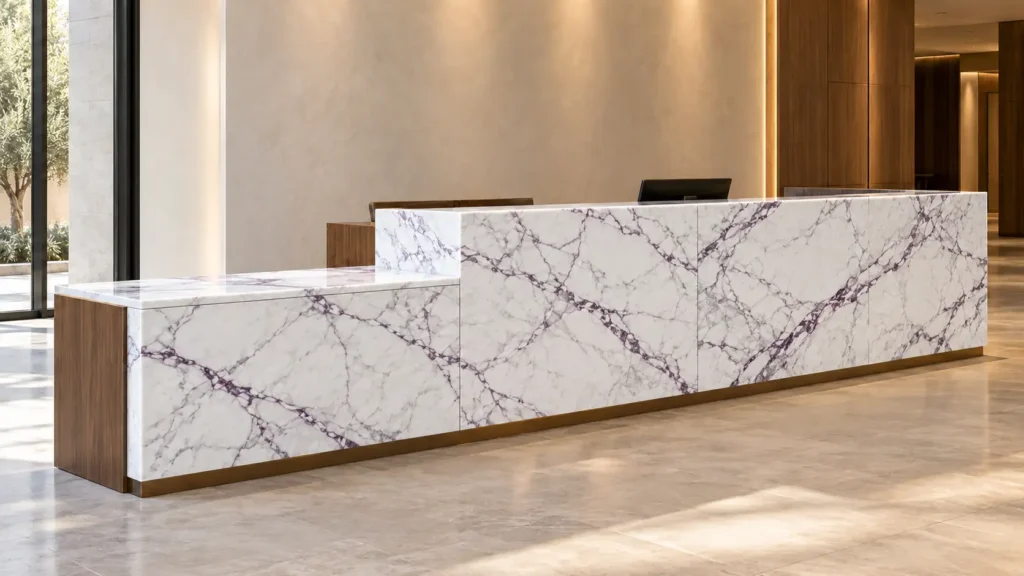
A marble reception desk should be designed as a working counter with coordinated stone, support, joinery, services and installation requirements. Resolve how staff and visitors will use it before approving the external form.
The front elevation may be the lobby’s main material feature, but the success of the desk also depends on the less visible details: monitor positions, cable routes, access panels, storage and how the stone reaches the site.
This guide covers reception desks finished in natural marble. Specify the actual material clearly when comparing quotations, since marble-look boards and manufactured surfaces are different products.
Start with the Reception Workflow
Map the tasks that happen at the desk.
A hotel may need check-in, document handling, payment and luggage coordination. An office may prioritize visitor registration, security communication and meeting-room directions. Those tasks affect the arrangement of equipment, staff positions and public surfaces.
Review:
- How visitors approach and leave.
- How many people use the desk at once.
- Where staff sit, stand and move.
- Where documents or devices are exchanged.
- Which equipment needs to remain visible.
- What storage and service access are required.
Use the plan and a section through each working position. A convincing front rendering cannot establish whether the desk is comfortable to operate.
Coordinate Public and Staff Counter Levels
Distinguish the visitor interaction surface from the staff worktop. They may be at different levels and may use different materials.
Show the completed heights, depths, overhangs and clear spaces. Coordinate seated and standing use, communication across the counter and the accessibility requirements applicable to the project.
Where a lower section is included, review the complete arrangement around it: approach, clearances, support and the task it serves. A change in counter height alone does not establish accessibility.
For a custom desk, a simple full-size mock-up can help the team review sightlines, reach and equipment positions before cutting the stone.
Define What the Stone Package Includes
A desk that appears to be one marble volume may contain several different assemblies.
| Element | Decision to document |
|---|---|
| Public front panels | Stone thickness, panel sizes, joints and fixing arrangement |
| Visitor counter | Finished level, exposed edges, support and openings |
| Staff worktop | Material, equipment layout, cable management and maintenance |
| Side returns | Corner treatment, vein relationship and exposed faces |
| Supporting frame or carcass | Who designs, supplies and installs it |
| Access panels and plinth | Removal method, service access and floor junction |
| Lighting or metal details | Space, fixings, wiring and replacement access |
Identify responsibilities between the stone supplier, joinery contractor, support designer, services team and installer.
A clear scope prevents the visible marble from being priced while essential supporting work remains undefined.
Select Marble for the Main Viewing Direction
Review the material from the position where visitors first see the desk.
A long front panel can reveal the overall vein structure. A close approach brings edges, corners and joints into view. Select the stone with both distances in mind.
Two options from the VeraMarbles collection illustrate different visual directions:
Dark Horizon is described as a charcoal-brown marble with fine white and soft grey veining. Its material page provides a starting point for a darker desk composition.
Arctic Thunder has a bright white background with bold violet, purple and dark grey movement. Its material page introduces a lighter, more expressive direction.
Review actual slabs beside the lobby finishes and under representative lighting. Neither description establishes stock availability or the suitability of a particular piece for the final desk.
Compose All Visible Faces Before Fabrication
Prepare a stone layout showing the front, counter, returns and any exposed end panels.
Place those outlines over photographs of the proposed material. Include service openings, signage positions and metal details so they do not remove or interrupt an important formation unexpectedly.
Decide how the pattern should behave at corners:
- Continue visually where the selection and cutting permit.
- Turn in a deliberate new direction.
- Meet as a compatible tonal composition.
- Form an approved mirrored arrangement using suitable material.
Show the chosen approach rather than leaving “vein matching” undefined.
Approve panel joints at the same time. Their location should respond to the material, support, fabrication and installation plan.
Separate Edge Appearance from Construction
A deep-looking counter edge may be formed using a bonded apron or return. Draw the actual stone section and its relationship to the support beneath it.
Confirm the support for horizontal surfaces, corners and overhangs with the responsible designer and fabricator. Identify the proposed stone’s condition, treatments and backing information where relevant.
Specify the exposed edge treatment in section. Review a sample where visitors will frequently touch the surface.
At the floor, resolve the plinth or recessed base together with cleaning access and the surrounding finish. Include the method for accommodating site tolerances.
Freeze Equipment and Openings Early
Coordinate the actual equipment schedule before releasing the counter for fabrication.
Show monitors, terminals, printers, telephones, cable outlets and any other required devices in the drawings. Check space for plugs and connections below the visible surface as well as the opening above.
Agree cable routes through the worktop, carcass and floor or wall connection. Preserve access for replacing equipment without dismantling the stone front.
If a logo, illuminated detail or metal inlay is part of the desk, define its dimensions, attachment and electrical requirements. Include the detail in the stone layout and support coordination.
A small late change to a device position can affect several trades, so establish who approves changes after fabrication release.
Choose the Form with Production and Delivery in View
Straight desks, segmented curves and shaped stone elements offer different production routes.
For a curved concept, ask the fabricator to explain the proposed construction. Clarify whether the surface uses faceted pieces, shaped slabs or another agreed method. Review joints and the finished geometry using drawings and a representative sample.
For any form, confirm component sizes against the usable stone and the building access route. Include unloading, lifts, doorways, turning spaces and the installation position.
If the desk must arrive in sections, coordinate their assembly order and support connections. A deliberate installation joint can be incorporated into the design before fabrication begins.
Review the Assembly Before Dispatch
A desk with several visible stone faces benefits from a coordinated pre-dispatch review.
Depending on the scope, this may include component photographs, a dry assembly or a mock-up of a critical corner. Record the agreed checks rather than describing every project as fully tested.
Review:
- Piece identification and orientation.
- Dimensions and opening positions.
- Approved material range and finish.
- Joint and edge appearance.
- Alignment with the support or joinery assembly.
- Protection, packing and installation sequence.
Label components to match the approved drawings. Where several similar desks are supplied, assign each set to its intended location.
Plan Care Around Daily Operation
A reception desk is a frequently used surface. Discuss the intended cleaning products and the operator’s expectations before approving the finish.
The Natural Stone Institute recommends suitable neutral cleaning products and explains the acid sensitivity of calcareous materials. It also describes impregnating treatments as repellents rather than products that make stone impervious. Natural Stone Institute care guidance
Agree care for the actual marble, finish, joints and adjacent materials. Identify which surfaces receive the most contact and confirm any treatment with the relevant supplier.
Honed or polished appearance should be selected alongside those requirements. Neither finish should be presented as maintenance-free.
What to Send for a Comparable Quotation
Provide a coordinated package containing:
- Plans, elevations and working-position sections.
- Material candidates and the acceptable visual range.
- Stone thicknesses, finishes and edge details.
- Counter levels, support concept and scope responsibilities.
- Equipment schedule, openings and service routes.
- Assembly, delivery and installation requirements.
- Quantity, project location and approval milestones.
Ask suppliers to identify inclusions and exclusions. Compare the same stone scope, support arrangement and installation responsibilities rather than an overall desk price alone.
Frequently Asked Questions
Does a marble reception desk need to be solid stone?
No. It may use stone panels and counters over a designed supporting assembly. The specification should identify the actual construction.
Can the staff worktop use a different material?
Yes. Select each surface around its use and coordinate the junction, levels, support and visual result.
Can the desk have a curved front?
Potentially, subject to the selected stone and proposed fabrication method. Approve the construction, joints and representative finish before production.
Is a lower counter section automatically accessible?
No. The responsible project designer should review the complete approach, clearances, working surface and applicable requirements.
Develop Your Marble Reception Desk
VeraMarbles’ natural-stone project services include material selection, sampling, shop-drawing coordination and quality follow-up.
Share the desk drawings, equipment layout, material preferences and project location. Identify the support and joinery scope so the stone selection, cutting layout and production requirements can be reviewed together.