
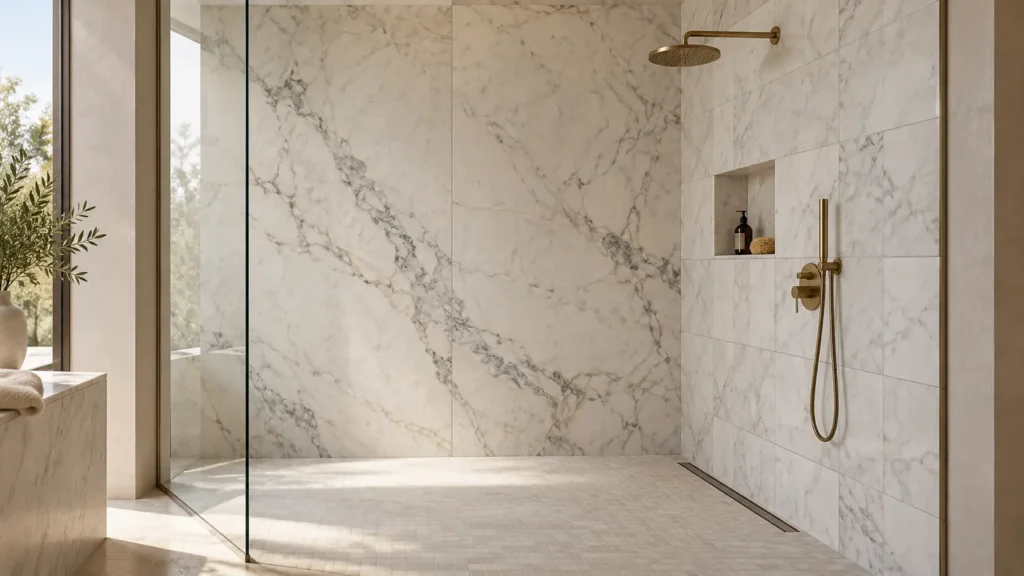
Marble shower walls can be composed from large slabs, modular tiles or a combination of both. Choose slabs when the design relies on broad areas of natural veining. Choose tiles when a repeated grid, smaller components or more flexible setting-out better suits the room.
For either format, confirm the suitability of the actual stone and its installation assembly before approving the material.
This guide covers natural marble. Cultured marble panels and marble-look porcelain are different products with their own installation and maintenance requirements.
For architects, the decision starts with the wall elevations. Joint positions, vein direction, niches and fittings determine how the stone will appear after fabrication. A coordinated specification resolves those relationships alongside waterproofing, support and maintenance.
Marble Slabs vs Tiles: Which Suits the Project?
Slabs preserve larger areas of the stone’s geological pattern. Tiles divide that pattern into a repeated architectural module.
Neither format is universally better. The choice should respond to the room, available material, installation conditions and intended visual result.
| Consideration | Marble slabs | Marble tiles |
|---|---|---|
| Visual effect | Broad areas of natural veining | Repeated grid and smaller compositions |
| Joint layout | Fewer field joints | More joints that become part of the design |
| Material approval | Actual slabs and cutting positions | Batch range and distribution |
| Handling | Panel weight and access require early planning | Smaller components may simplify handling |
| Replacement | Large panels can be difficult to replace | Spare tiles may help with future repairs |
| Budget | Include slab yield, fabrication, delivery and lifting | Include tile format, cuts, setting-out and labor |
Compare quotations against the same drawings and scope. A supply-only price does not account for the handling, cutting and installation requirements that can influence the final cost.
Start with the Wall Elevations
Draw the shower before selecting the final format.
Each elevation should show:
- Finished wall dimensions.
- Panel or tile joints.
- Shower controls and outlets.
- Niches, shelves and seats.
- Glass connections.
- Exposed edges.
- Transitions to adjacent finishes.
Identify the principal view into the bathroom. The wall seen first may justify a carefully selected slab, while a secondary wall can support the composition with quieter material or a modular layout.
Consider a shower with a broad back wall and a side wall containing controls and a niche. A slab could preserve the back wall’s natural composition, while tiles provide a clear module around the smaller details.
Test that arrangement in elevation using actual material dimensions.
Coordinate Tile Size with the Complete Wall
Include joint widths when drawing the tile layout.
A centered niche may appear balanced on its own but leave narrow strips of marble at the wall edges. Adjust the module, starting point or niche dimensions until the entire elevation works.
For slabs, review the usable material area. Overall slab dimensions do not establish that every required panel can be cut from it.
Plan Vein Direction Before Fabrication
Directional marble requires an orientation strategy.
Vertical movement can reinforce height. Horizontal movement can connect surfaces across the room. A controlled mixture of orientations may suit a quieter stone or a less formal composition.
For slabs, place the proposed panel outlines over photographs of the actual material. Show the niche, controls and other openings on the same layout.
This reveals whether a cut-out will remove a significant part of the composition before fabrication begins.
For tiles, agree whether the veins should follow a common direction or form a balanced mixed arrangement. Review several pieces together; a small sample cannot represent a complete wall.
For a material-specific example, see the VeraMarbles guide to Afyon Violet marble applications, finishes and care, which discusses full-slab selection and planning openings.
Approve Bookmatching from the Actual Slabs
Bookmatching uses suitable sequential slabs to create a mirrored composition.
Approve the actual slab pair, cutting layout and central joint. A specification that says only “bookmatched marble” leaves the most important visual decisions unresolved.
Review the composition with fittings and openings shown. Check where the pattern terminates at the floor, ceiling and adjoining walls.
A mirrored pair does not automatically provide continuous matching around every corner.
Check Panel Access, Weight and Support
A full-height marble panel must be practical to deliver and install.
Before confirming panel dimensions, review:
- Vehicle and unloading access.
- Doorway and corridor dimensions.
- Stairs, lifts and turning spaces.
- Lifting equipment.
- Installation clearances.
- Panel weight and vulnerable cut-outs.
Coordinate thickness with handling, support, edge details and adjacent finishes. A thicker panel is not automatically the correct solution, and a thinner panel is not automatically suitable for the proposed installation.
The fabricator and installation designer should confirm the support and fixing arrangement, including whether mechanical restraint is required.
If a single panel is impractical, introduce a deliberate joint and revise the composition before fabrication.
Specify the Waterproofing Behind the Marble
The stone finish does not replace the shower’s waterproofing system.
Schluter’s shower guidance explains the need for waterproofing behind tiled finishes and continuity throughout the assembly. Corners, penetrations and wall-to-floor transitions must be resolved within the selected system. Schluter shower waterproofing guidance
Coordinate the backing, membrane, setting material and joint details together. Confirm that the proposed natural-stone application falls within the system’s permitted use.
Large marble panels require a review of their installation and support. A conventional tile detail should not simply be enlarged without checking its suitability.
Confirm Adhesive Compatibility with the Supplied Stone
Request information about resin treatments, mesh reinforcement, repairs and coatings on the bonding face.
Adhesive selection must account for the actual product supplied.
LATICRETE’s technical guidance distinguishes moisture-sensitive marble and resin-backed stone when discussing installation materials. Obtain compatibility advice for the proposed stone, backing and waterproofing assembly. LATICRETE technical guidance
The phrase “suitable for marble” is not enough to resolve every installation condition.
Detail Niches, Corners and Fittings Early
A niche contains several visible stone surfaces: the back, sides, head and sill. Draw each component and show how it meets the surrounding wall.
Coordinate the sill’s drainage toward the shower with the selected waterproofing detail.
Before approving fabrication, establish:
- Whether the niche aligns with the wall joints.
- How its back relates to the surrounding veins.
- Which edges remain visible.
- How shelves are supported.
- How fittings and glass connections are installed.
For external corners, review finished edges, butt joints, mitred returns or compatible profiles with the fabricator.
Use a physical sample where the detail is prominent. Include the movement accommodation required by the installation design, even where the architectural intent is visual continuity.
Choose Honed or Polished Marble Under Representative Lighting
Polished marble creates stronger reflection. Honed marble produces a more subdued surface.
Compare representative samples beside the proposed glass, metal finishes and lighting. Where appearance is critical, review the stone both dry and wet.
Choose the shower-wall finish separately from the shower-floor finish. Floor suitability requires its own assessment of drainage, use and slip performance.
A wall sample does not establish floor performance.
Agree the Maintenance Routine Before Approval
The selected marble should suit the cleaning routine the owner or operator can maintain.
The Natural Stone Institute recommends appropriate neutral cleaning products and warns about acidic substances on calcareous stone. Its guidance also explains that impregnating treatments act as repellents rather than making stone impervious. Natural Stone Institute care guidance
For hospitality projects, review the proposed cleaning products with housekeeping before final material approval.
Record the products and methods in the handover information. Select any treatment for compatibility with the stone and wet-area use, and follow the treatment supplier’s guidance rather than prescribing a universal resealing schedule.
Follow a Clear Approval Sequence
A practical approval process helps connect design decisions with production:
- Approve the wall elevations and intended slab or tile arrangement.
- Review representative stone, finish and backing information.
- Confirm the waterproofing, bonding and support design.
- Approve slab cutting layouts or tile range and distribution.
- Review a representative mock-up.
- Confirm openings and fitting positions before releasing fabrication.
- Record cleaning and replacement-material requirements.
For repeated hotel bathrooms, approve a representative room or assembly before releasing the full production quantity.
Define both the acceptable natural variation and the details that must remain consistent.
Frequently Asked Questions
Are marble slabs always more expensive than tiles?
No universal price relationship applies. Compare complete quotations covering material, cutting, finishing, delivery, handling and installation.
Can marble shower walls be completely seamless?
A single panel can eliminate joints within its face. Corners, connections, panel boundaries and required movement joints still need detailing.
Should spare marble be ordered?
Discuss a replacement strategy before production. Retained material or spare tiles may help with repairs, but later purchases may differ from the original selection.
Does this specification also apply to steam showers?
Steam enclosures require a separate review of vapor management, temperature exposure and system suitability. Confirm that the proposed assembly is explicitly suitable for the intended steam application.
Discuss Your Marble Shower Wall Requirements
VeraMarbles provides material sourcing, production coordination and quality control through its natural-stone project services.
To begin a project discussion, share wall elevations, approximate quantities, preferred marble and finish, delivery location and target dates. Include niche and fitting positions where available so material selection and cutting requirements can be reviewed together.