
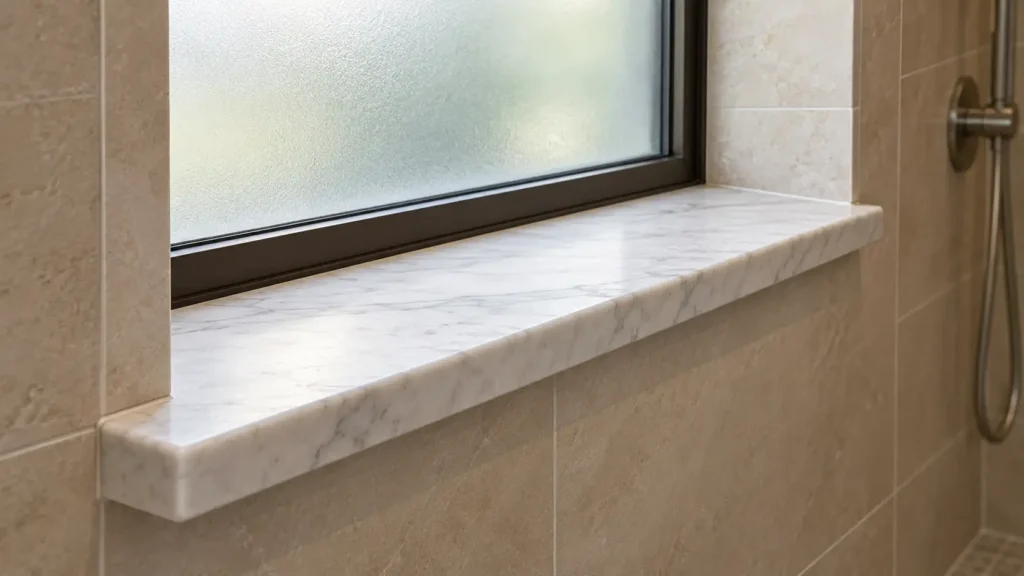
A marble bathroom window sill finishes the base of a window recess with a single stone surface. The detail needs to resolve the finished opening, exposed edges, window operation and the way water moves across the sill.
Location changes the specification. A sill beside a vanity may receive occasional splashes; one inside a shower receives direct water and must form part of a coordinated wet-area assembly. Establish that exposure before choosing the profile or releasing cutting dimensions.
Define the Sill’s Exposure
Mark each window on the bathroom plan and identify how it will be used.
| Location | What to review |
|---|---|
| Inside the shower | Direct spray, fall toward the shower, waterproofing continuity and the frame connection |
| Above or beside a bath | Splash exposure, reach for cleaning and access to window controls |
| Beside a vanity | Tap splash, cleaning products and the relationship to the backsplash |
| Away from direct splash | Condensation, frame interfaces and the finished wall junction |
This guide concerns the interior stone sill. The exterior sill, flashing and window drainage need their own coordinated details.
Confirm that the selected window and its interior finish are suitable for the proposed exposure. Adding marble beneath a frame does not establish the suitability of the window assembly.
Measure the Finished Recess
Dimension the sill from the installed window and the intended finished wall surfaces. Rough-opening dimensions alone do not establish the stone size.
In plan, show the distance between finished jambs, the position of the frame and the front edge of the sill. In section, show the stone thickness, supporting build-up, frame interface and finished top levels.
A simple depth relationship is:
Sill depth = distance from the specified rear stone edge to the finished wall face + front projection.
Identify the rear stone edge clearly. It may meet the face of the frame or another approved interface; it should not be assumed to extend beneath the frame.
Specify joint allowances separately. Where the recess is out of square, use a verified template or measured geometry rather than hiding the discrepancy in oversized end joints.
For multiple rooms, record each sill by opening reference. Similar-looking windows can have different reveal depths or handed notches.
Choose How the Sill Meets the Jambs
Two common arrangements produce different cutting shapes.
Sill contained within the recess: the stone finishes between the side reveals, with the front edge flush with or projecting beyond the wall. Coordinate whether the jamb finishes terminate above the sill or meet its ends.
Sill with projecting ears: the front portion extends beyond the opening at each side. Draw the shoulder positions and notch geometry, including which short edges remain visible.
Check the installation sequence before selecting the arrangement. A sill trapped beneath completed jamb finishes may be difficult to position or replace.
If stone also lines the jambs, issue an elevation and sections showing the bottom corners. State the intended joint arrangement and vein direction for each piece.
Show the Fall on a Shower Window Sill
A shower sill needs a defined route for water to leave its surface. Avoid a rearward fall that directs water toward the frame or a raised front trim that creates a pocket.
Schluter’s curbless shower assembly detail specifically includes window sills among the horizontal surfaces that must slope toward the shower drain. Apply the requirements of the selected waterproofing system to the project.
Show the fall direction and rear and front levels in section. Coordinate how the supporting build-up and finished stone will achieve the required geometry. Do not leave the slope to an installer interpreting a flat elevation.
A projecting front edge can change the appearance of the detail, but it does not replace the waterproofing connection behind the stone.
Coordinate the Frame Connection Before Covering It
The junction between the window and the wet-area construction deserves its own enlarged detail.
Ask the window supplier and waterproofing supplier to confirm:
- The approved surface for the waterproofing connection.
- Compatible bonding and sealing materials.
- Required preparation of the frame surface.
- Treatment of the lower corners and adjoining jambs.
- Which frame channels, drainage openings or removable components must remain accessible.
Keep the visible finish joint and the concealed waterproofing connection identifiable in the drawing. A neat bead at the back of the sill does not, by itself, describe the complete assembly.
Agree who inspects that connection before the stone covers it. Record the approved detail with the window reference so it remains clear during installation.
Check Window Operation in Section
For an opening window, draw the sash movement and the space needed to operate the handle. Check these against the proposed stone thickness, rear joint and any upstand.
A deeper sill also changes how far someone must reach to open the window or clean the glass. Review that reach where a bath, vanity or shower screen sits in front of it.
If blinds or screens are planned, locate their fixings and service clearances before completing the reveals. Coordinate any penetrations through the wet-area construction.
For fixed glazing, confirm how the glazing system is maintained or replaced and whether the stone restricts access to removable frame components.
Specify Every Visible Stone Surface
“Finished sill” is an incomplete fabrication instruction. Identify the top, front edge, exposed ends and any underside visible beneath a projection.
Choose an edge profile that suits the scale of the opening. A small eased edge can keep a narrow sill visually quiet; a deeper built-up edge needs its actual construction shown separately from the slab thickness.
Check the proposed marble, backing treatment and setting materials for the exposure. Some moisture-sensitive or resin-backed stones require particular installation materials or may be unsuitable for certain wet-area assemblies.
For a restrained white palette, Afyon White marble offers a bright background with subtle crystalline texture and soft natural movement. Review the actual slab and finish sample alongside the window frame and wall finish before approval.
Within the wider marble collection, select the cutting area with the narrow sill proportions in mind. Mark the room-facing edge and viewing direction on the slab layout. A small sample cannot show where a strong vein will fall across the finished strip.
Release a Complete Sill Schedule
Include these items in the quotation and cutting package:
- Opening reference, room and exposure.
- Verified length, depth, thickness and cutting shape.
- Front projection, ears and notches where applicable.
- Material, finish, edge profile and exposed-face schedule.
- Fall direction and finished levels for shower locations.
- Jamb arrangement and frame-junction detail.
- Supporting build-up and installation responsibilities.
State which dimensions remain provisional and who approves the final template. Avoid using the manufacturer’s stock sill sizes as project dimensions without checking the opening.
VeraMarbles provides natural-stone project support, including drawing review, sample coordination, shop-drawing coordination and dimensional checks. Send the window section and sill schedule together so the stone scope can be reviewed against the surrounding construction.
Frequently Asked Questions
Can marble be used for a window sill inside a shower?
It can be considered where the selected stone, window and installation materials suit the exposure. The sill needs coordinated drainage, support and waterproofing details.
Should the sill project beyond the bathroom wall?
That is a design decision. Dimension the projection against the finished wall and review exposed ends, nearby fittings and cleaning access. There is no single projection that suits every opening.
Does the sill need to match the vanity top?
No. Matching can connect the room’s stone elements, while a quieter sill can simplify a strongly patterned interior. Compare actual samples and define the intended relationship.
Is a single-piece sill preferable to several pieces?
A single piece avoids intermediate stone joints, but feasibility depends on its length, shape, slab condition and installation access. Confirm the proposal with the fabricator before fixing the layout.