
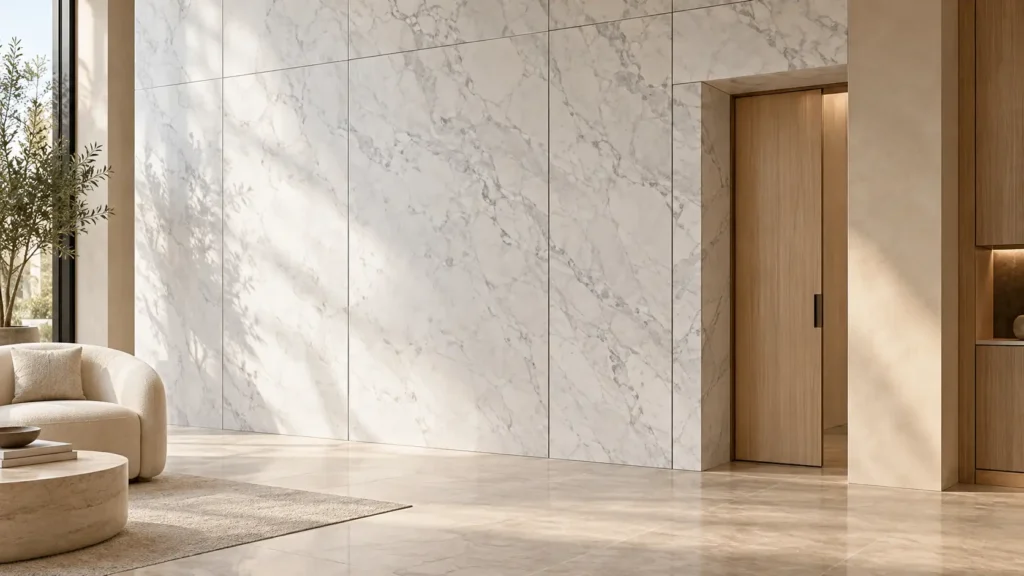
Marble Wall Cladding: Panel Layout and Specification Guide for Architects
Marble wall cladding should be specified through coordinated elevations, material selection and an installation design. Resolve the panel grid, joints, corners, openings and support arrangement together before fabrication.
A beautiful slab is only the starting material. The finished wall depends on where it is divided, how each piece is oriented and how the stone meets the rest of the room.
This guide focuses on natural marble panels for interior walls. Exterior façades, ceilings and specialist wet-area assemblies require their own application-specific design.
Begin with a Real Panel Elevation
Draw the individual panels rather than representing the entire wall with a stone hatch.
Show the finished width and height, doors, recesses, sockets, lighting, skirting, ceiling junction and adjoining finishes. Establish the principal viewing direction and any important architectural axes.
Then test where the panel joints should fall.
A joint might align with a doorway, frame a central feature or form a regular grid. Each approach can work when it responds to the actual room and available material.
Check the complete elevation before committing to a repeated module. A balanced central field can still leave awkward narrow pieces at the ends.
Distinguish Panel Size from the Setting-Out Module
State whether the scheduled dimension describes the stone face or the module that includes its joint.
A 600 mm-wide panel plus a specified joint does not produce the same grid as a 600 mm setting-out module. Repetition across a long wall makes that distinction important.
Include joint widths in the elevation and use the same dimensioning basis in the cutting schedule.
Confirm how the installer will establish the finished setting-out points on site. Record which dimensions come from the approved design and which need final site measurement.
Select the Material at Wall Scale
Review full-slab photographs and representative samples together.
The photographs help establish vein distribution and usable areas. Physical samples communicate colour, finish and the relationship to surrounding materials.
For a quieter white-and-grey direction, VeraMarbles describes Aegean Gray as a white marble with soft grey clouding and delicate movement. Review the actual proposed selection rather than interpreting the name as a promise of a uniformly grey surface.
More expressive options can be shortlisted through the marble collection.
In either case, approve the visual range across the quantity needed for the wall. One small sample cannot describe every panel in a large composition.
Choose the Pattern Strategy
Agree how the stone should read across adjacent pieces.
| Strategy | Intended result | Approval needed |
|---|---|---|
| Consistent orientation | Veins or movement share a common direction | Panel arrows and approved distribution |
| Controlled mixed layout | Natural variation is balanced across the field | Complete layout with stronger and quieter pieces identified |
| Vein-flow composition | Selected formations relate across adjoining panels | Actual slab arrangement and cutting positions |
| Bookmatched composition | Suitable material forms a mirrored arrangement | Actual slab pair, central joint and finished elevation |
Use the actual material to evaluate the strategy. A general request for “continuous veins” leaves the intended result open to interpretation.
Where several walls meet, decide whether the composition turns the corner, changes direction or ends deliberately at the junction.
Design the Panel Format with the Installation System
Panel dimensions, stone thickness and support belong in the same design review.
Confirm the substrate, finished wall build-up, panel weight, fixing concept and access for installation. Have the responsible specialist assess the actual material and proposed arrangement.
The Natural Stone Institute’s vertical-surfaces guidance addresses both mechanically anchored and adhesively attached interior veneer. That distinction reinforces the need to select a system for the project rather than assume one attachment method suits every marble panel. Natural Stone Institute vertical-surfaces guidance
Record the proposed system and its requirements in the coordinated drawings. Include relevant information about stone repairs, backing treatments and setting-material compatibility.
A decorative material approval should be accompanied by approval of how the panels will be supported and installed.
Resolve Corners and Exposed Ends
Corners make the wall build-up visible.
Compare the proposed mitred return, finished exposed edge, butt joint or adjoining profile using the actual stone section. Show how the detail terminates at the floor and ceiling.
A rendering can imply a sharp continuous edge while leaving the real junction unresolved. Review a sample where that edge is prominent or frequently touched.
At a free end, clarify which faces are finished and whether backing or support components need to be concealed. Coordinate the detail with adjacent joinery or plaster before fabrication.
Coordinate Doors, Sockets and Service Access
Include the actual opening positions in the panel layout.
For sockets and controls, show the finished face location, opening size and relationship to panel edges. Confirm how the device is supported and how the faceplate meets the marble.
At doors, draw the jamb and head returns. Review the panel divisions around the opening rather than leaving the cuts to follow whichever pieces arrive on site.
If an access panel is required, establish how it opens, how its stone is supported and how it can be removed. A visually concealed panel should still have a practical maintenance method.
Coordinate any later changes through the drawing approval process. A moved opening may affect the selected slab position, panel geometry and installation sequence.
Review Lighting with the Finished Surface
Approve the finish under lighting representative of the room.
Polished stone introduces stronger reflections. A honed surface gives a more subdued sheen, while surface pattern and natural variation remain part of the appearance.
Review the wall from the main approach and from positions close to it. Include grazing lighting in the mock-up where it forms part of the design.
Agree the relevant surface, joint and alignment acceptance criteria before production. A lighting decision made late can change how prominently those details are seen.
Define Joints at the Wall Boundaries
Panel joints are only part of the joint design.
Review the connections to ceilings, floors, columns, door frames and other wall finishes. Include the movement accommodation required by the selected assembly and coordinate it with the building’s relevant joints.
Specify the intended joint appearance and compatible filling or sealing materials through the project team.
Avoid using a nearly joint-free rendering as the only reference for approval. The drawings and sample should show the real junctions that will be built.
Number the Panels Before Packing
Once the layout is approved, assign each piece an identifier that appears on the elevation, cutting schedule and packing record.
Include an orientation mark where rotation affects the result.
For an expressive wall, agree the extent of pre-dispatch review. A photographic layout, dry arrangement or representative mock-up may be appropriate to the scope.
Keep the approved record linked to the piece numbers. This helps the site team reproduce the selected arrangement rather than redistribute the panels by convenience.
Plan packing and installation order together where access or sequencing requires it.
Establish Inspection and Handover Requirements
Agree what will be checked at fabrication, pre-dispatch and installation stages.
The review may include dimensions, openings, finish, edges, material range, piece identification and correspondence with the approved layout. Installation checks should follow the selected system and project requirements.
Record the agreed acceptance procedure and who signs off each stage. Do not describe a wall system as tested unless the relevant tests have actually been completed.
Provide the cleaning and treatment instructions for the actual stone, finish and joint materials. Keep any replacement-material strategy and panel-location record with the handover information.
Before Releasing Fabrication
The approval package should include:
- Fully dimensioned elevations with joint widths.
- Approved material references and acceptable visual range.
- Slab selection, cutting positions and panel orientation.
- Coordinated support, substrate and wall build-up.
- Corner, opening and boundary details.
- Final service positions and access-panel arrangements.
- Finish samples and any required mock-up approval.
- Piece numbering, inspection and installation sequence.
Identify unresolved dimensions explicitly. A drawing should not be treated as ready for production while essential site measurements or opening positions remain provisional.
Frequently Asked Questions
Should marble panels always run from floor to ceiling?
No. Full-height panels are one option. Choose the format around the elevation, usable stone, support system and practical installation requirements.
Does bookmatching remove the need for joints?
No. It describes a visual arrangement of suitable material. The panel boundaries and required joints still need to be designed and approved.
Can an access door be faced in the same marble?
Potentially, when its support, opening method, clearances and removal procedure are designed together. Include the access panel in the stone layout from the beginning.
Is one small sample enough to approve a wall?
It can help approve colour and finish, but a large wall also needs a representative range and layout review. Keep physical samples and actual material photographs together.
Plan Your Marble Wall Cladding
VeraMarbles’ natural-stone project services include material selection, sampling, shop-drawing coordination and quality follow-up.
Share the wall elevations, approximate quantities, preferred material and finish, opening positions and project location. Include the proposed installation scope so the stone selection and panel layout can be coordinated before production.