
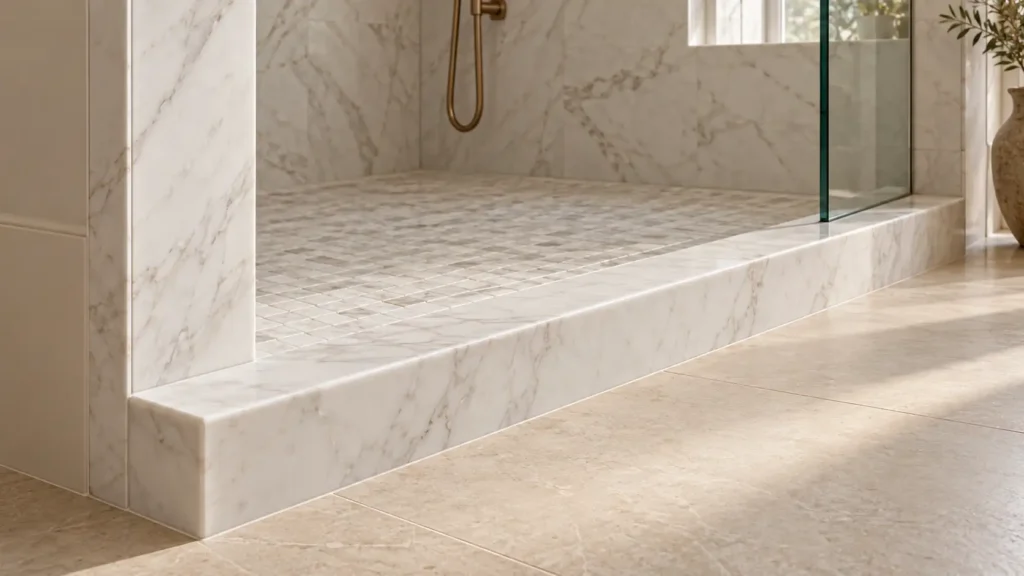
A marble shower threshold should be specified as part of the entrance assembly: stone, support, waterproofing, adjacent floor levels and glass connections. Its dimensions and edge profile should follow that detail.
The term “threshold” is used for several different pieces. It may describe the stone cap over a raised shower curb, a strip between two floor finishes or a complete set of entrance components. Clarify which item is being supplied before requesting a quotation.
This guide covers natural marble at shower entrances, with emphasis on raised curbs, vertical jambs and coordinated stone transitions.
Define the Entrance Components
Separate the visible stone from the construction beneath it.
| Component | Role in the detail | What to identify |
|---|---|---|
| Curb | Raised construction at the shower entrance | Substrate, support, waterproofing and finished height |
| Curb cap | Horizontal stone covering the curb | Width, thickness, fall, edge treatment and end joints |
| Jamb | Vertical side of the opening or its stone lining | Finished opening, lining thickness and hardware positions |
| Transition strip | Stone between adjoining floor finishes | Finished levels, joint positions and intended use |
| Glass assembly | Screen, door and associated hardware | Support, clearances, fixing method and sealing interfaces |
A stone cap does not establish the waterproofing performance of the complete entrance. Equally, a product sold as a “threshold” may be only a cut piece of marble rather than a ready-to-install shower system.
Choose the Entry Type Before Ordering Stone
Confirm whether the project calls for a raised curb, a lower transition or a flush entrance.
That decision affects floor build-up, drainage, enclosure design and access. A thin stone strip cannot turn an otherwise unsuitable floor arrangement into a successful curbless shower.
For projects with accessibility requirements, have the responsible designer confirm the entrance configuration and finished geometry before selecting a stock threshold.
Keep the design decision separate from available catalogue sizes. Order the stone to suit the approved entrance rather than altering the entrance to fit an attractive standard piece.
Measure Against Finished Surfaces
A rough opening is not necessarily the final stone length.
The finished opening depends on wall linings, jamb pieces, installation materials and joints. Establish whether the curb cap runs between the jambs, beneath them or into another approved junction.
Show both a plan and a section. Include:
- The finished opening between the side surfaces.
- The curb width after its inner and outer faces are finished.
- Cap thickness and exposed edge depth.
- Any overhang or return.
- Finished shower and bathroom floor levels.
- Joint allowances and glass position.
For a renovation, confirm dimensions at the stage agreed with the installer. An early site measurement should not be treated as a final fabrication dimension if the lining build-up is still changing.
Design the Curb Cap and Drainage Together
The top surface must be coordinated with the selected shower system’s inward drainage detail. Show the direction and required fall in section rather than relying on an installer to infer it from a flat stone schedule.
Review how the cap meets the inner curb face, jambs and glass. Avoid details that create a lip or pocket where water can remain.
The cap width should account for the completed curb and the enclosure arrangement. A wider piece is not automatically a better solution if it creates an awkward overhang or interferes with the door.
Confirm the Assembly Beneath the Cap
Check the substrate support, waterproofing connections and compatibility of the setting materials with the actual stone and backing.
Schluter’s prefabricated curb instructions, for example, require support beneath the curb and sealed connections to the shower base and walls. Its installation handbook also calls for the finished curb surface to slope toward the shower drain. Follow the current detail for the system actually selected. Schluter shower curb guidance and installation resources
Treat joints and connections as part of the assembly. A single stone cap can simplify the visible layout, but it does not remove those interfaces.
Select the Edge Profile for the Junction
An eased square edge can suit a restrained contemporary opening. A bevel or rounded profile may suit a different transition or design language.
Approve the actual profile in section. Commercial names such as “single bevel,” “double bevel” or “Hollywood bevel” can be interpreted differently between suppliers.
Specify the exposed faces and the width and depth of any shaping. Review where the profile stops at the ends and how it meets the jamb.
A bevel changes the edge geometry. It does not, by itself, establish accessibility, slip performance or suitability for the proposed entrance.
Coordinate Jambs with the Curb Cap
The jambs frame the opening and establish several visible junctions close to the threshold.
Decide whether the vertical pieces sit above the cap or meet it in another arrangement. Draw the joint rather than leaving the stone supplier and installer to make separate assumptions.
Check the appearance of the lower corners, where a horizontal cap and vertical lining meet. Show edge terminations, joint positions and any required movement accommodation.
For matching marble, review the cap and jamb pieces together. A small tonal difference can become conspicuous when narrow pieces form a continuous frame.
Resolve Glass and Hardware Before Cutting
The glass supplier should review the stone entrance detail before fabrication is released.
Confirm the door or screen location, required bearing surfaces, hardware clearances and any holes or notches. Coordinate anchorage with the support and waterproofing design.
Do not specify drilling through the curb cap as an incidental site task. Any penetration needs an approved detail appropriate to the selected assembly and hardware.
Likewise, do not assume that a thick stone cap automatically provides suitable anchorage. The glass installation must be supported by its complete approved arrangement.
Include door swing and bottom-clearance checks in the coordinated drawings. Review how the selected seals interact with the sloped surface.
Choose the Actual Stone and Finish
Narrow stone pieces can reveal a different character from the slab photograph. A dramatic vein may become a short dark band across the entrance; a quiet selection may provide a more continuous appearance.
Mark the proposed threshold and jamb pieces on the material layout when visual coordination matters. Identify the visible faces and orientation.
Select the finish for the actual exposure and use. Do not assign a slip rating from the words “honed” or “textured,” and do not transfer a wall-finish approval to a stepped-on transition.
Where the bathroom uses beige marble flooring, the Burdur Beige flooring guide can support the wider material and layout discussion. The entrance detail still requires its own approval.
Plan Joints and Installation Sequence
A long single-piece cap can create a quiet entrance line, but its fabrication and handling must be practical.
If a joint is necessary, position it deliberately. Review its relationship to the glass, jambs, stone pattern and support beneath the pieces.
Agree when final measurements are taken, when the waterproofing is checked and when the stone is installed. Identify which dimensions are fixed and how construction tolerances will be accommodated.
The installation sequence should protect the finished edge from later trades. Keep the cap covered appropriately during remaining work and follow the installation-material manufacturers’ curing requirements.
What to Include in a Threshold Quotation Request
Provide enough information for suppliers to price the same scope.
| Information | Why it matters |
|---|---|
| Plan and section | Establish the geometry and adjacent construction |
| Piece dimensions | Distinguish fabrication sizes from rough openings |
| Material and finish | Define the proposed stone selection |
| Edge drawing | Remove ambiguity about bevels and exposed faces |
| Jamb arrangement | Clarify end junctions and related pieces |
| Glass requirements | Identify coordinated cut-outs or hardware interfaces |
| Quantity and location | Establish production and delivery scope |
| Approval requirements | Identify samples, mock-ups and dimensional checks |
For repeated bathrooms, approve a representative entrance detail before releasing all pieces. Identify room types or variations so dissimilar openings do not receive an identical stone schedule by mistake.
Frequently Asked Questions
Is a marble threshold the same as a shower curb?
Not necessarily. The curb is the raised construction; the marble threshold may be only its stone cap. Confirm the supplier’s scope.
Does a single-piece marble cap make the entrance waterproof?
No. The waterproofing depends on the full assembly, including its connections to the walls and shower base.
Can a standard marble threshold be used for a flush entrance?
Only if it suits the approved floor levels and entrance detail. A stock strip does not establish the drainage or accessibility of a flush shower.
Should the threshold match the bathroom floor?
It can match, coordinate or contrast. Review the actual pieces together and consider how the entrance reads beside the jambs and glass.
Coordinate Your Marble Entrance Detail
VeraMarbles’ natural-stone project services include material selection, shop-drawing coordination, dimensional checks and production follow-up.
Share the entrance plan and section, preferred marble, edge profile, quantities and delivery location when discussing the stone scope. Include the approved glass and waterproofing interfaces so the cap and jamb pieces can be coordinated before fabrication.